Updated: 25.11.25
As a natural formulator, you have a whole range of plant-based emulsifiers available to you to create a variety of botanical creams, lotions, and serums. One of the most popular ones on the market right now is Vegetal – also known as Montanov™ 68 MB, SugarMulse, or Glucomulse, which you might already be familiar with if you’ve taken one of our formulation courses.
Vegetal is a naturally-derived emulsifier that creates stable oil-in-water emulsions with a soft and rich skin feel. It’s eco-friendly, made 100% from renewable vegetable origin, and works great in natural skincare and haircare formulations.
It also happens to be one of our favourite emulsifiers at Formula Botanica as it’s so versatile and easy to work with. In this post, I’ll share everything you need to know to create your own emulsion with Vegetal – plus a special bonus at the end, so stick around!
What is an emulsion?

An emulsion is simply a blend of oil and water, brought together by a special ingredient called an emulsifier to form a smooth, homogenous mixture (like a cream).
Think of it as the magic ingredient that binds your oil and water together. Without it, your creams would just separate into two.
There are many natural emulsifiers available, and they differ in type and process. Some are oil-in-water (O/W), while others are water-in-oil (W/O). Some need heat to work (known as hot-processed), while others can be used without heat (called cold-processed).
For example, Vegetal is a hot-process, oil-in-water emulsifier. You can learn more about this fascinating topic in the posts below:
How to make a hot cold process emulsion
Oil-in-water vs Water-in-oil emulsions
In an oil-in-water emulsion, fine droplets of oil are dispersed throughout a water-based (aqueous) phase. These emulsions tend to be lighter and more fluid, like a milk or a cleansing lotion.
In contrast, water-in-oil emulsions contain tiny droplets of water dispersed within an oil-based phase. These emulsions are typically thicker, richer, and more indulgent on the skin. Of course, there are exceptions, which we explore in detail in our courses.
Many of our students typically prefer oil-in-water emulsions, perhaps because they feel familiar and are similar to mainstream creams and lotions, and light enough for daily use. Choosing the right emulsifier is ultimately a personal decision. Always consider your ingredients, the texture you want, and your formulation goals before choosing.
Want to learn more about the science of emulsification? Check out our Advanced Diploma in Organic Cosmetic Science, where you’ll learn everything you need to know about emulsifiers and how to make professional-grade emulsions!
Introducing Vegetal (aka Montanov ™ 68 MB)
In this blog post, I want to introduce you to Vegetal, an easy-to-use, versatile, and widely available natural oil-in-water emulsifier we love at Formula Botanica. You might also see it under its other trade names, like Montanov™ 68 MB, SugarMulse, and Glucomulse.
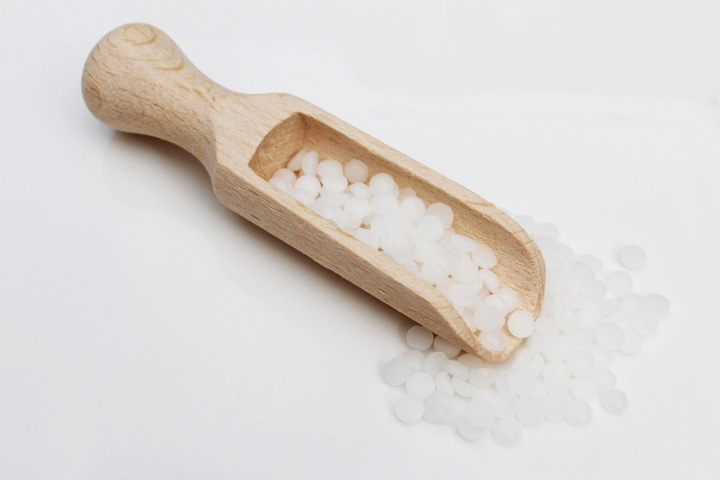
Its INCI name is Cetearyl Alcohol (and) Cetearyl Glucoside.
Vegetal is a PEG-free, non-ionic emulsifier made from 100% natural sources. It may be derived from palm, coconut, corn, or other plants, so it’s always worth double-checking with your supplier to make sure it aligns with your ethos.
According to its manufacturer, SEPPIC, Vegetal is suitable for both skin and haircare applications, and can create thick cream textures with a soft and rich skin feel. From experience, I can tell you it’s also incredibly easy to work with and doesn’t give that strong soaping effect that some emulsifiers have.
But what really sets Vegetal apart is its ability to create lamellar-structured emulsions. But what does that actually mean?
Lamellar emulsions 101
Lamellar emulsions are a kind of emulsion that form liquid crystals and lamellar networks that mimic the skin’s natural structure. This not only gives your creams a beautifully silky feel and excellent stability, but it may also help deliver active ingredients deeper into the skin while keeping it well moisturised.
Don’t worry if you can’t understand this yet; this is an advanced concept you’ll learn about as you progress in your studies.
Curious to learn more about lamellar emulsions and how to work with them in your formulations? Check out the Lamellar Emulsions Mini Lab, available in the Formula Botanica Lab, our exclusive membership site for formulators who want to continue their professional development and stay ahead of trends.
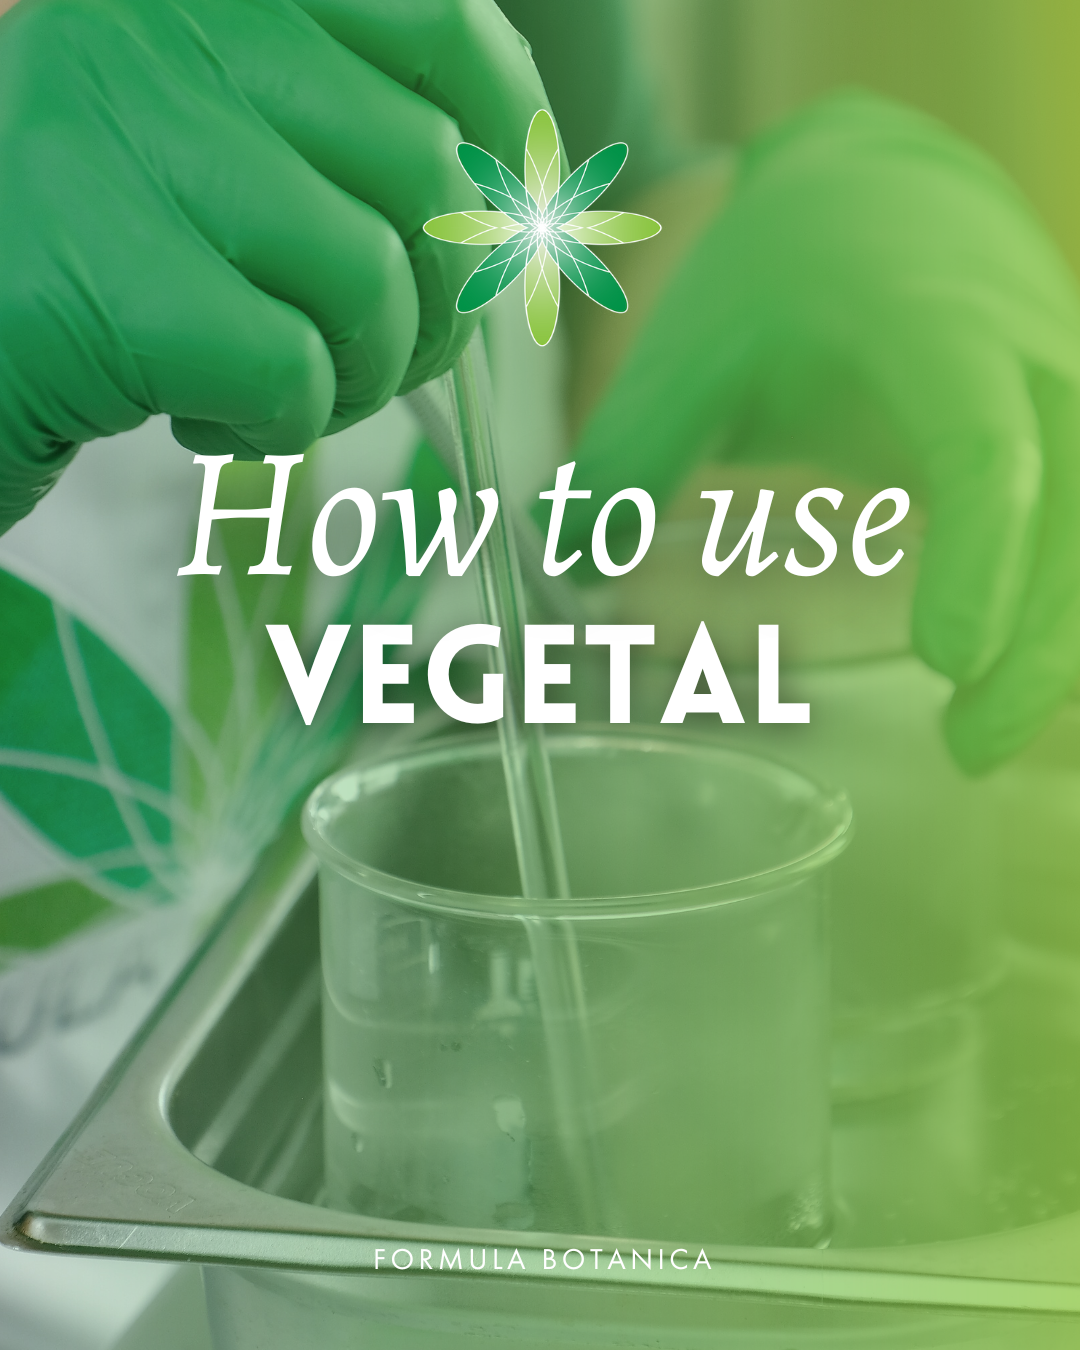
How to formulate with Vegetal
- Solubility: Oil (add to your oil phase)
- Process: Hot process (70–75°C)
- Usage rate: 3–8%
With Vegetal, you can create a wide range of skincare products – from rich, thick creams to lighter, more fluid lotions – simply by adjusting your oil-to-water ratio and other ingredients. A good starting point is a 25% oil phase with 6% Vegetal, then tweak your formula as you experiment.
You can also add xanthan gum (or another gum) to stabilise the water phase, or stearic acid, butters, or waxes in your oil phase to thicken the final product.
To work with Vegetal, heat it in the oil phase to 70–75°C. You don’t need expensive equipment to make a great emulsion — a mini whisk works perfectly. If you have a homogeniser like the Kai Blendia (our student favourite) or a larger lab homogeniser, use it during the initial emulsification phase.
Once the emulsion has formed, you can switch back to a mini whisk for the cool-down phase. Just make sure you don’t disrupt the emulsion’s lamellar structure. I personally like to use a handheld mini whisk once a thin emulsion has formed. As always, check your supplier’s data sheets before you formulate with a new ingredient, like Vegetal, and follow the recommended method for best results.
Sample emulsions with Vegetal
To show you the versatility of this emulsifier, I have created 3 different samples using sunflower oil and distilled water in each of them, so you can see the difference in viscosity.
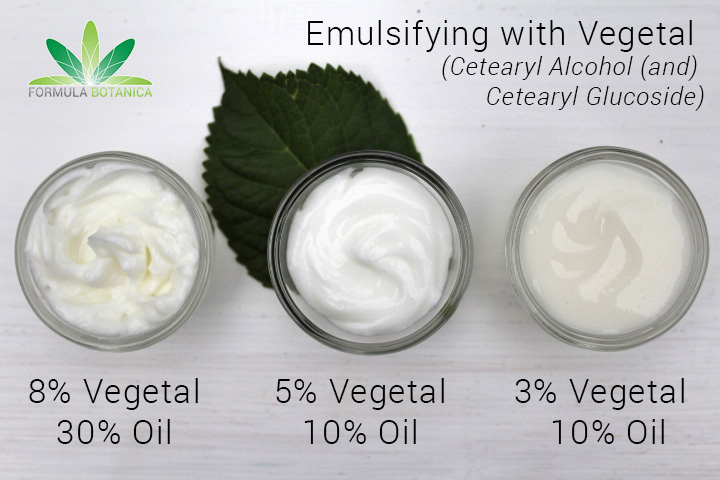
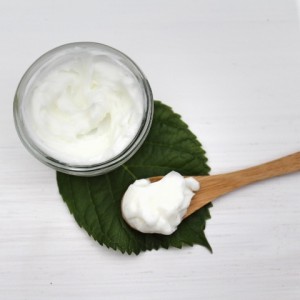
 Sample 1: 30% oil and 8% Vegetal
 Sample 1: 30% oil and 8% Vegetal
For the first sample, I used 30% oil with 8% Vegetal, resulting in a thick, creamy emulsion with excellent stability. The higher oil content gives the cream a rich, luxurious feel on the skin. It leaves the skin very soft and not greasy at all, which isn’t something you’d expect from a rich cream. This would be ideal as a night cream or even as a hand cream.
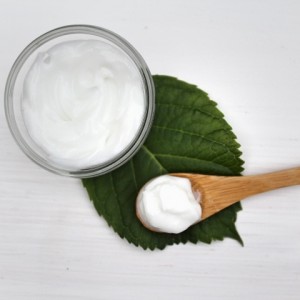
Sample 2: 10% oil and 5% Vegetal
 Sample 2: 10% oil and 5% Vegetal
I then trialled 10% oil together with 5% Vegetal to create a thinner cream. The final product has a thinner consistency and would work well in an airless packaging. It resulted in a very smooth and shiny cream that can be used for both facial and body skincare. I can imagine using this emulsion for day products, or for younger skin at night.
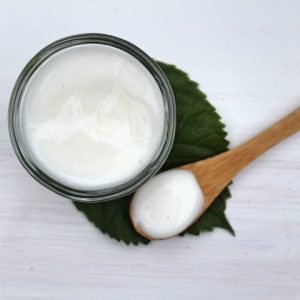
Sample 3: 10% oil and 3% Vegetal + 0.2 Xanthan gum
 Sample 3: 10% oil and 3% Vegetal + 0.2 Xanthan gum
Finally, I blended together 10% oil with 3% Vegetal. However, I also added 0.2% xanthan gum to this blend to stabilise it. This cream is the thinnest version of the three samples I made; it could make a lovely day moisturiser or even a nice facial wash with some surfactant added to it. As it isn’t oily, you can come up with something amazing for oily skin.
Pro tip: Before you prepare any new formulations, consider what product you want to create, how this emulsifier fits in your formulation ethos and experiment, experiment, experiment.
Bonus: Make a calendula & Q10 night cream with Vegetal

As a special bonus, I wanted to show you how to make this calendula and Q10 night cream, using Vegetal.
Calendula is a wonderful skin-soothing herb which also provides a beautiful orange colour to the finished product. I’ve paired the macerated calendula oil (learn how to make macerated oils here) with Coenzyme Q10 and two beautiful CO2 extracts to make it a luxurious night cream.
I’ve also added shea butter to give the cream additional thickness. How gorgeous does it look?!
- Makes: 100g
- Level: Beginner-friendly to intermediate
- Formulation type: Hot-process (Requires heating)
Equipment:
To make this calendula & Q10 night cream with Vegetal, you’ll need the following equipment:
- Personal protective equipment (PPE): Nitrile gloves, a medical-grade face mask, a disposable head cover, and an apron
- Jewellery scales (0.01g precision)
- Glass beakers, glass pipettes/glass rod/stainless steel spoon/stainless steel spatula/silicone spatula
- Water bath
- Thermometer
- Electric mini whisk or homogeniser
- Handheld mini whisk
- Suitable packaging (like a sealable glass jar)
You can find all of this equipment listed on Formula Botanica’s Amazon storefront.
Step-by-step formulation method
Here are the four simple steps to make this gorgeous calendula and Q10 cream.
- Step 1: Heat the water and oil phases
After you’ve cleaned and sanitised your workspace and equipment and worn the appropriate PPE (Personal Protective Equipment), heat both phases in separate glass beakers in a water bath until they reach 75 degrees Celsius.
To do so, weigh the shea butter, apricot oil, calendula macerate, jojoba oil and vegetal in a beaker, taring after each addition.
In another beaker, weigh the aloe water, glycerine, and xanthan gum, stirring well. Then add both beakers to your water bath, giving the water phase a head start.
You can easily make a water bath by placing a glass bowl over a pan of boiling water, just like a bain-marie.
Just make sure not to heat and hold your ingredients (Not sure why? Read this article).
- Step 2: Pour the oil phase into the water phase
Once both phases reach 75°C, turn off the heat and pour the oil phase into the water phase while using a homogeniser or a whisk. The emulsion will form quickly.
Remove the blend from the water bath and continue stirring (now use a mini whisk). You can place the beaker in ice water to speed up the cooling process.
- Step 3: Add the heat-sensitive ingredients
When the temperature of the blend has dipped to below 35°C, you can add your heat-sensitive ingredients (the vitamin E, the Coenzyme Q10, the Co2 extracts, and the essential oils), blending well after each addition. You may want to pre-weigh them in a small beaker beforehand, to make it easier to measure.
Check the pH to ensure it is suitable for your preservative before you add it. In my example, I had to raise the pH a bit. Then add the preservative and recheck the pH to check it’s compatible with the skin’s pH range (4.5-5.5).
You can learn more about pH and the importance of preservation here and in our Diploma in Organic Skincare Formulation.
- Step 4: Package & label
All you have left to do now is to package and label your formulation with the date and name! I find a glass jar works best for this emulsion. And that’s it! See how easy that was? I hope you love making and using it.
Final thoughts
Now it’s your turn! Purchase a sample of Vegetal and show us the emulsions you made by hashtagging us at #FormulaBotanica on Instagram, as the team and I would love to see what you create. Also, let me know what you think in the comments below.
If you are new to formulating and want to learn how to create gorgeous skincare products like the one in this post and more, then enrol today for our Diploma in Organic Skincare Formulation and learn how to create 25+ natural skincare products from scratch, without a recipe!
To give you a feel of the course, you can first take part in our free mini botanical skincare training course. But be warned: formulation is seriously addictive!
Have you ever used Vegetal? What’s been your experience? What do you like about it, and what would you like to see next on our blog? Share your thoughts with me in the comments below!
FAQ
- How do you make natural emulsifiers?
Unless you are an experienced cosmetic formulator, you won’t need to nor wish to make natural emulsifiers. You can easily purchase natural emulsifiers from a range of different suppliers, which we list in our courses.
- What’s the difference between oil-in-water and water-in-oil emulsions?
An oil-in-water (O/W) emulsion disperses fine droplets of oil in a water-based phase. These tend to be lighter, more fluid, and easily absorbed – perfect for milks or daily creams. A water-in-oil (W/O) emulsion disperses tiny droplets of water in an oil-based phase, producing a richer, thicker, and more indulgent cream.
- What makes Vegetal special?
Vegetal is a plant-based, PEG-free, non-ionic emulsifier that creates lamellar-structured emulsions. This means your creams mimic the skin’s natural structure, giving a luxurious feel, excellent stability, and potentially better delivery of active ingredients into the skin. It’s also very forgiving to work with and doesn’t create a “soapy” effect like some emulsifiers.
- What percentage of Vegetal should I use?
Vegetal can be used at 3–8% of your total formula, depending on the oil-to-water ratio and the final texture you want to achieve. A good starting point is 6% Vegetal with a 25% oil phase, then adjust as you experiment.
- Do I need special equipment to formulate with Vegetal?
Not at all! You can make emulsions with Vegetal using a mini whisk. If you have a homogeniser like the Kai Blendia (a student favourite) or a larger lab homogeniser, use it during the initial emulsification for extra smoothness, then switch to a whisk during the cool-down phase to preserve the emulsion’s lamellar structure.
- Where can I learn more about emulsions and natural skincare formulation?
At Formula Botanica, we offer free and paid self-paced courses to teach you everything from basic natural formulations like facial oils and balms to advanced formulations like creams and serums. Join tens of thousands of students today by enrolling in our free training course, and learn how to formulate organic skincare and haircare from scratch today!
FREE TRAINING
Learn how to become an
Organic Skincare Formulator
FREE TRAINING
How to become an
Organic Skincare Entrepreneur
FREE TRAINING
How to become an
Organic Skincare Entrepreneur

Timi was a key member of the Formula Botanica team from 2015 to 2020; first as our Education Manager and then as Head of Formulation & Research. You can find out more about the Formula Botanica team here.


