
Every other month, Formula Botanica sets its students and graduates a formulation challenge. We’ve run challenges in the past such as:
- How to make a natural shower jelly
- How to make a butter scrub
- How to make an aqueous gel using a natural solubiliser
- How to make a body butter
- How to make a natural gel scrub
- How to make a night-time facial oil for mature skin
You might have seen the photos we proudly share on social media of the amazing products made by our amazing students.
This month we are going back to basics with a fun and creative assignment for our students:
How to make a Body Melt
Lotion bars, also called facial or body melts are among the most promising products in natural and organic cosmetics. They are easy to make, easy to test and easy to handle. Free from water and therefore no need to add any preservative, they allow you to use creative but environmental friendly and packaging that avoids plastics. The only limitation when making facial or body melts might be your imagination as the sky is the limit!
All you need is the right balance between your solid and liquid ingredients, a nice combination of essential oils, additives such as anti-oxidants, skin feel enhancers and a mould. If you have a soap making background and have lots of soap moulds in your stash, then you can use any of them. If you do not have any soap moulds, don’t worry, you can use cookie moulds or ice cube moulds or even up-cycle a small tetrapack carton for your first trials. I’m sure after you’re familiar with the technique and have achieved a formulation that you love, you’ll become obsessed with facial/body melts and will equip your lab with a bunch of beautiful moulds.
You can prepare these melts in any size, I personally prefer small sizes for ease of handling and a better hygienic performance.
Body Melt Formulation Advice
There are absolutely no rules or limitations (unless the safety requirements of your ingredients dictate this obviously, particularly with the dermal limits of the essential oils you apply). For a practical application however you should consider that the body melt must keep its form and consistency during storage and as you keep it in your hand during the short application time. It would be very unpleasant when the body melt really melts in your hand and drips as soon as it comes into contact with your skin temperature.
On the other hand however, you cannot apply high melting point butters and waxes. This is not going to be a massage candle and must glide smoothly over your skin and melt over your skin by applying very light pressure.
These are the key points when formulating facial and body melts:
- Keep the essential “keep it simple silly” (KISS) principle in mind and start as simple as possible.
- Test the stability and performance of your product to check that it works well for your climate.
- After you’re happy with the consistency, stability and performance, you can build the formulation upwards and layer by layer.
How to make my Sunshine Amazonian Body Melts
I’ve decided to use one of my colourful oils for this challenge. The beautiful Buriti oil imparts a nice and cheerful orange colour to the product. You can use other colourful oils or lipophilic plant extracts.
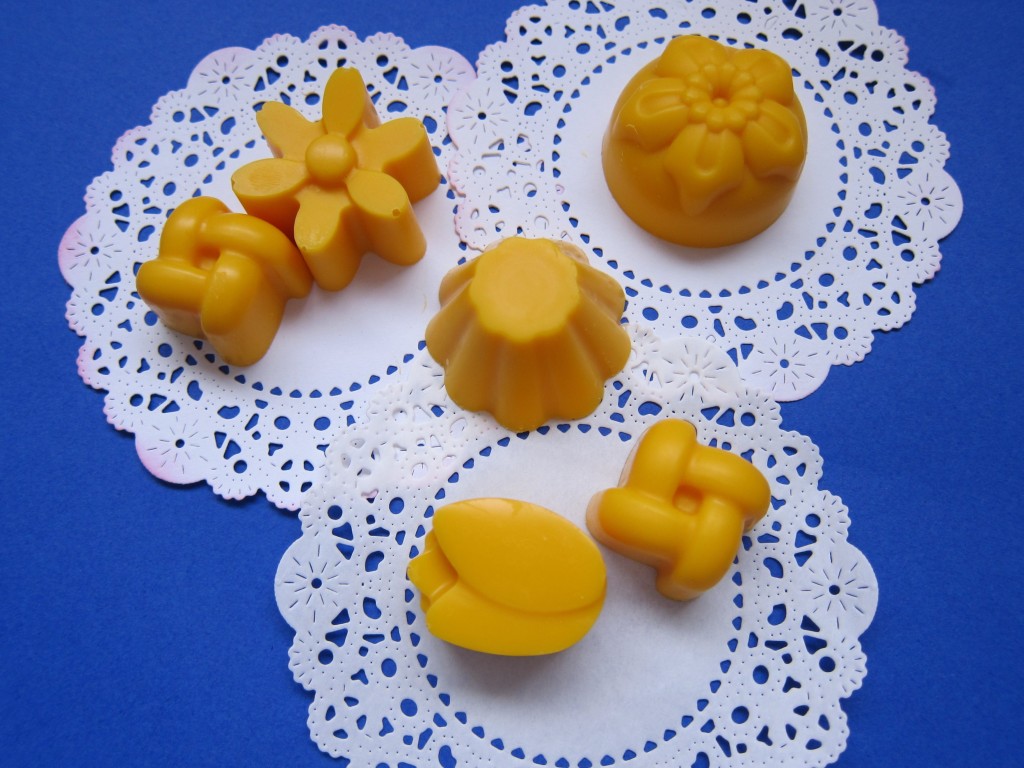
To give you a rough approximation of how to proceed, I’ll share my very basic formulation with you.
My Ingredients:
- Cocoa butter 60.0%
- Cupuacu butter 19.0%
- Babassu oil 10.0%
- Alpha-Tocopherol 0.5%
- Rosemary CO2 extract 0.1%
- Buriti oil 9.9%
- Mandarin essential oil 0.5%
Method:
1. In a water bath, melt the cocoa butter, babassu oil and cupuacu butter. Stir gently during melting.
2. After this blend has melted, stop heating and remove the beaker from the water bath. Add tocopherol, rosemary extract and buriti oil and stir gently. As the temperature goes down to around 35 C, add the essential oil. Put the beaker in an ice/water bath and keep stirring or put it in the fridge but stir it in 10 minutes intervals until you reach a trace. Keep in mind that the stirring during the cool down phase leads to a nice and smooth melt with a shiny appearance and without any grittiness.
3. As you reach a “trace”, pour the blend into your mould and put it into the fridge. Let it rest overnight or at least for 12 hours. After 12-24 hours, demould and enjoy your creation.
Storage:
If you’ve chosen the right combination, the melts should not be kept in the fridge. I keep some in my bathroom almost all year around, in summer and winter (as part of my stability tests). As long as they are not directly exposed to sun or any heating source, they maintain their form and consistency. (Disclaimer: in Germany, we can have 8 degrees Celsius in July as well as in January, but to be quite honest, I don’t ship any during summer months)
As you see, I haven’t applied any waxes in this formulation and I’m sure you can achieve a reasonable and acceptable consistency without any waxes as well. Now it’s your turn. Looking forward to seeing your amazing creations.
Want to join in with Formula Botanica’s bi-monthly formulation challenge? Become a student today and you automatically become part of our thriving international community of students.
Leave us a comment

Dr. Elham Eghbali was Formula Botanica’s Cosmetic Chemist between 2014 and 2018. She has over 20 years’ industry experience and is based in Bavaria, Germany. To read more about Formula Botanica’s team, visit our staff page.


